Vegan Indian – Saag (Palak) Tofu

Saag is a pretty ubiquitous dish in northern India and I’m sure you’ll run into multiple variations in Indian restaurants all over the world. I have tried countless recipes and almost without exception they have failed miserably. So I figured I’d make my own, and rather than using the usual paneer (milk cheese), I’d go full vegan and use tofu. Tried tested and true, this dish is a big hit with vegans and non-vegans alike.

Recipe: Saag Tofu

  • Time required: 30 min prep and cooking plus 1 to 24 hours marinating
  • Serves: 2 as a main dish, 4 as a side
  • Style: Vegan, Indian
Prepared Ingredients Ready to Go

Ingredients:

  • 1/2 Pkg. extra firm tofu drained and cut into 1-1.5 cm cubes and marinated
  • 1 Pkg. Frozen chopped spinach, thawed and drained, or 1 large bundle of washed, stemmed and chopped fresh spinach (*see notes)
  • 2-3 Tbsp Canola oil
  • 1/4 tsp Fenugreek seeds
  • 1/2 tsp Cumin Seeds
  • 1-2 Pods cracked green cardamom
  • 1 Med. Onion finely diced
  • 2 cm Piece ginger root finely grated
  • 2-3 Cloves garlic finely grated or minced
  • 2 tsp Sambal Oelek (or to taste)
  • 1 tsp Turmeric powder
  • 2-3 tsp Cumin powder
  • 2 tsp Amchur powder
  • 1-2 tsp Fine sea salt
  • 1/2 tsp Dried Chili powder
  • 1 Sm. Tomato, diced or 1/4 cup drained canned diced tomatoes
  • Fresh cracked black pepper (optional)
  • 1 Tbsp Good quality margarine

Marinade:

  • 2 tsp Sea salt
  • 1-2 Tbs White vinegar
  • 1 Tbsp Canola oil
  • 1 tsp palm or white sugar (optional)
  • 1/2 tsp Turmeric
  • 1-3 tsp Cumin powder
  • 1 tsp Coriander powder
  • 2 cm Piece Ginger Root Grated
  • 2 Cloves of Garlic grated
  • 1/4 tsp Smoked Paprika powder (optional)
Marinating Tofu (step 3)

Directions:

  1. Combine all ingredients for marinade in a non reactive mixing bowl.
  2. Dice tofu, pat dry, place in a resealable plastic bag and pour in the marinade. Toss the tofu to coat in the marinade and seal, removing as much air as possible.
  3. Marinate the Tofu from 1-24 hours (at least an hour, but more is always better).
  4. After marinating remove the tofu and drain or gently wipe off the marinade with your fingers. Do not rinse.
  5. Heat the canola oil in a wok or frying pan over a medium-high heat. When hot add fenugreek, cumin seed and cardamom pods and stir until the funugreek starts to lightly brown–about 30 seconds. Do not burn.
  6. Add the tofu to the pan and fry until lightly browned, turning sparingly. Take the pan from the heat, remove the tofu and set aside. 
  7. Returning the pan to the heat add a little more oil. When hot add the onions and saute until translucent.
  8. Add the garlic, sambal and ginger to the pan. Fry for two minutes stirring frequently to prevent the garlic from browning.
  9. Add the remaining dry spices and stir well. Cooking for one minute.
  10. Add the chopped/diced tomato and a little water. Cook until the tomatoes start to break down and combine with the onion adding additional water as necessary to prevent the ingredients from sticking to the pan. When cooked it should look a little like a thin sauce–not too wet or dry.
  11. Add the fried tofu and drained spinach to combine and heat through. Do not cook more than a few minutes as the spinach will rapidly lose its bright green colour. 
  12. To make a slightly richer dish, add the margarine at this point.
  13. Season with a little extra salt if necessary and a few grinds of black pepper.
  14. Serve on its own over white basmati rice or as a bright side dish.
Frying Tofu (step 6)
Completed Dish

Notes:

  • Technically speaking Saag is made from any edible tender greens, while Palak refers exclusively to spinach. The recipe above is spinach based but feel free to try it with any other tender greens (just blanch to soften if they are on the tougher side).
  • If you use a microwave to defrost frozen spinach, do so near the end of the cooking process slightly before the time to add it to the dish. I’ve found that if you defrost it too early it will darken and lose its vibrant colour over time. 
  • You can use whole or creamed frozen spinach to make this dish as well. I’ve tried both and it just changes the appearance and texture a bit–still delish!
  • It looks a little complicated but it’s quite easily managed. Prepare your marinade and tofu in the morning and it will be ready to go for dinner or lunch. When preparing the final dish, lay out the spices and other prepared ingredients in small bowls by adding times. It takes 15 minutes to prep and 15-20 to finish.


Mexican Dreaming: Snapper Veracruz

I first encountered this dish in Zihuatanejo on the west coast of Mexico over 25 years ago. It remains one of the best meals I’ve ever had in that beautiful country and is so simple to prepare that’s it’s worth sharing.

Menu

  • Snapper Veracruz
  • Thai scented rice
Snapper Veracruz

Recipe: Snapper Veracruz

  • Serves: 2-4 depending on additional side dishes
  • Time: 30-45 minutes
  • Style: Mexican, Fish, Seafood, Main

Ingredients:

  • 2-4 good quality white fish fillets
  • 1 Med. red bell pepper cut into thin strips
  • 1 Med. green bell pepper cut into thin strips
  • 1 or more small Serrano chilies, seeded and minced (opt.)
  • 1 Med. onion sliced in thin strips
  • 2-4 cloves of garlic minced
  • 1 Med. Tomato, chopped (or 1/2 cup canned diced tomatoes)
  • 1/4 cup green olives chopped or sliced
  • 1-2 tsp of drained capers
  • 1 tsp Cumin, ground
  • 1/2 tsp Dried Oregano
  • 1/2 c Red/White wine
  • Water (as needed)
  • 2-3 Tbsp Cilantro, chopped
  • Coarse Salt
  • Olive oil
  • Fresh ground black pepper
  • 1/2 Med. Lime
Salted Fillets
Wrapped Fillets

Method:

  1. Prepare the fish fillets – Rinse with cold water (and debone if not boneless). Pat dry with paper towel and liberally salt both sides with coarse salt. Wrap salted fillets in multiple layers of paper towel or a clean tea towel. Thinner fillets should be salted for about 8-10 minutes, slightly thicker for 15-20. After resting rinse off the salt from the fillets under cold running water, pat dry and set aside.
  2. Once the fish is ready, prepare your vegetables – Cut the sides away from the core of the bell peppers and thinly slice (about 2-3 mm thickness). Skin and cut the onion in half lengthwise and cut into thin slices about the same thickness as the peppers. Mince the garlic and chilies (if using), pit and slice the olives. Chop the tomato into roughly 1 cm cubes.
  3. Create the sauce – In a large frying or sautéing pan, add a tablespoon or so of olive oil and heat to medium. Add the onions when the oil is hot, fry for a minute or so then add the peppers stirring frequently. When the peppers start to soften a little, add the garlic and chilies (if using) and cook for two minutes being careful not to brown the garlic. Add the cumin and crushed oregano and stir for a minute to combine. Throw in the tomatoes and add a few grinds of black pepper. Add wine, olives and capers. Reduce the heat a little and stir occasionally until the tomatoes break down and the mixture becomes “sauce” like. If it looks a little dry add a bit more wine or water. Taste and add more salt/spices if necessary.
  4. Cook the fish – Pushing the vegetable mixture to the outer edges of the pan, carefully lay the prepared fillets in the middle of the pan and then push the vegetable/sauce mixture over the top of the fillets and cook until done (about 5-10 minutes). Sprinkle in the chopped cilantro add a light squeeze of lime and serve over rice.
Prepped Ingredients
Sautéing Vegetables
Finished Sauce Covering Fish

Notes:

  • Salting the fish is entirely optional but it will firm the tender fillets and allow them to pick up the flavor or the sauce quickly. This step does not make the fillets taste “salty” provided you don’t leave the salt on too long.
  • The salt you use for the fish is important! Use pickling, very coarse kosher or coarse sea salt. Do not use table salt. The latter will destroy the delicate flesh of the fish and over-salt the finished dish.
  • This dish works with almost any type of whitefish – cod, lingcod, haddock, rockfish, etc- fresh or frozen. The fillets shown in the photos are pacific cod. The fillets shouldn’t be too thick, maybe 2 cm max. Thicker fillets will work but you’ll get less flavor from the sauce into the flesh. You could also substitute large uncooked prawns easily (but skip the salting if you do).
  • Figure on 250 grams (1/2 lb) of fish per person. The only trick is using a pan big enough to lay the fish into.
  • This is one dish where I don’t measure too closely. The measurements given are more of a guide than anything. Go with your gut. Not saucy enough? Add more tomato. Love olives? Go big. Not keen on spice? Skip the Serrano chili (I usually do even though I love spicy foods). Be creative.

Diego’s Hearts

  I had a guest around for a pre-Christmas dinner. He’s from Brazil and I had been out with him for dinner previously at one of those infamous Brazilian steak houses where he had asked for chicken hearts (a common grilled meat in Brazil). Unfortunately the restaurant was out of them at the time, so when he came for dinner I decided to serve a chicken heart appetizer (along with lamb chops). Shooting from the hip I came up with what turned out to be a tasty and inexpensive appy. 

At the end of the meal he asked what the dish was called. Since I had created it from scratch, I told him it had no name. His response was swift, “I’ll give it a name! A Diego!” Well I couldn’t argue, so I present you with Diego’s Hearts. 
Menu:

  • Diego’s Hearts (appetizer)
  • Pan seared lamb chops
  • Sauce Romaine
  • Roasted yellow mini potatoes
  • Steamed carrots

Recipe Diago’s Hearts:

  • 1 lb Chicken hearts (trimmed and rinsed)
  • Olive oil
  • 1/2 tsp garlic salt 
  • 1/2 tsp hot paprika
  • 1 tsp dried herbs du Provence ( or basil, oregano, etc.)
  • Salt/Pepper to taste
  • 1-2 Tbs butter or olive oil (for sautéing hearts) 
  • 1 cup Vegetable broth
  • 4-5 Brown mushrooms finely diced
  • 1 Tbs Salted butter (for sautéing mushrooms)
  • 1/4 cup heavy cream (whipping cream)
  • 1 medium Spanish onion thinly sliced and separated 
  • 2 Tbs Salted butter (for caramelizing onions)
  • 2-3 tsp Fine white sugar
  • Splash of balsamic vinegar
  • 8 Thin slices french baguette cut on the bias, toasted, and lightly buttered
  • 1 Tbs Italian parsley chopped finely
  • Crumbled Chèvre or shaved hard cheese (optional)

Method:

  1. Combine the hearts and next five ingredients and marinate for 1-3 hours at room temperature. 
  2. Create a mushroom cream sauce by sautéing the mushrooms in butter until well softened and then adding stock and cream. Simmer over low heat until slightly thickened. Keep warm. 
  3. Caramelize the onions in butter with the sugar, finishing with a small splash of balsamic. Keep warm in the oven in a heat proof dish. 
  4. Drain the and dry the hearts discarding the marinade and sauté in 1 Tbs olive oil or butter  over medium to high heat until just cooked 3-5 minutes. 
  5. Toast the baguette slices, butter and arrange 2 slices side by side on a small plate for each portion. 
  6. Top each portion of toast with a “nest” of caramelized onions. 
  7. Add the sautéed hearts into the nest of onions. 
  8. Drizzle 2-3 Tbs of the mushroom cream sauce across the stacked dish and finish with a light topping of parsley, fresh ground black pepper and optionally crumbled Chèvre or hard cheese shavings. 
  9. Serve hot. 

Notes:

Timing is the trick with this dish as all the elements need to be warm or hot. 

Serves 4.

The cheese topping is optional. I forgot to add it in my flurry of cooking, but I think it would have been a nice touch. 

Enjoy,

Aaron

Basic BBQ (Grilled) Salmon

image

A neighbour asked me the other day, “How do you do your BBQ salmon?” I laughed and said I did the same thing that everybody does. But I do have a few “secrets” which really help enhance the flavour of BBQ’d salmon (or any fatty fish for that matter).

Now before anyone in the East accuses me of confusing the difference between barbecuing and grilling–I wouldn’t dare confuse the low temperature smoke cooking done to make that mouth watering pulled pork, with simply throwing a chunk of steak on the grill (though there’s an art to that too). It’s just that on the coast we call grilling barbecuing.

So the trick to making a good piece of salmon into a great piece of salmon, is… salt. Pretty basic. Prior to grilling the salmon and prior to any other seasonings or marinades, I take the prepared piece of fish (fillet, steak, etc) and liberally sprinkle the exposed flesh with coarse pickling, kosher or other non-iodized salt then wrap it in a piece of clean linen or very clean dish towel and let it sit for 15-25 minutes depending on thickness. After this I rinse off the salt and pat dry with paper towel before continuing with adding marinades, spices, mirepoix or any other wonderful flavouring.

The salt does a couple of things. First it kills any lingering surface bacteria and removes any light “fishiness” that might cling to the meat, and secondly it takes moisture out of the flesh and subtly changes the texture. Why are these good things? Well the first one is pretty obvious, but in addition to freshening the fish it will also increase the shelf life of the fish by a few days–handy if you’re prepping fish for tomorrow’s dinner. The benefit of the second one is less obvious until you realize that if you remove moisture from anything it will naturally want to draw moisture back into itself, so if you replace the removed moisture with a marinade or a spice mixture it will draw that flavour back into the flesh–and that’s a win.

Aside from the salt cure, I follow some pretty basic guidelines for grilling:

  • First, fresh fish. It sounds simple, but most people don’t realize that when a fish smells strongly “fishy” it’s already gone. I’ll do a post later on how to buy good fish, but for now just remember that no smell is good smell
  • Second, skin on. If you’re using a marinade with sugar added, nothing is more heart wrenching (as a cook) than leaving chunks of caramelized fish clinging to the grill top. If you grill with the skin on you can always run a knife between the skin and the flesh and leave the skin on the grill for later cleaning. If you only have skin off fish then cook it on a sheet of well oiled aluminum foil (it will still stick, but not as badly and clean up is a snap).
  • Third, always test the thinnest part of the fish for doneness. If you check the thicker portion for doneness you will always end up with a rubbery tail section. Keep in mind that fish will continue to cook even after it’s left the grill.
  • Fourth, always oil the grill when hot. Doing so means less sticking. I got this tip from America’s Test Kitchen and it works. I use an oil soaked paper towel rubbed over the hot grill with tongs.
  • Finally, always a very hot grill. You can’t reasonably control the cooking time for a piece of fish by grilling it over low heat, also you don’t get that caramelized goodness from low temperature cooking.

Follow these basics and as long as you watch your cooking fish like a hawk, you’ll get good results every time.

Aaron

Fall fun: Cider Cocktail

IMG_2201.JPG

Recipe: Cider Cocktail

  • 1/2 oz Brandy
  • 2 Ice Cubes
  • 6 oz Dry Sparkling Hard Apple Cider – Honesty Box (NZ), Strongbow (UK), or  Big Rock (Cdn) are good choices.
  • 1″ Twist of lime (just the outer skin)
  • Dash Orange Bitters (Optional)

Method:

  1. In a champagne flute add the ingredients in order shown.
  2. Stir gently
  3. Enjoy

Notes:

Doesn’t get much simpler. The original recipe calls for expensive Calvados. This version uses less expensive brandy (Remi), with the lime twist and orange bitters adding a subtle hint of fruit in the mix.

Cheers,

Aaron

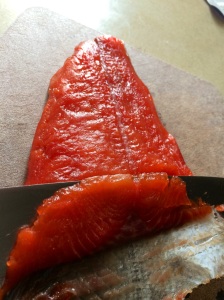
Gravlax – Smoked salmon without the smoke

IMG_2163

It’s Sockeye season on the West coast of BC, and 2014 is the peak return in a four year annual cycle for this tasty little salmon. The last peak in 2010 saw ten’s of millions of this species returning to their home waters to spawn, and while this year’s return is still underway the spawning population looks to be quite healthy.

It seems strange in the era of always-available fresh farmed salmon, but the sockeye run continues to be part of the “heritage” of coastal and central BC (and of course plays a huge role in the cultural heritage of first nations people). Neighbours regularly gift fish picked up from friends, off local fishing vessels, or even self caught. We swap recipes over drinks and talk about best preparations.

A standard fillet of salmon off a four pound fish can feed usually four adults, but there always seem to be more fish than the typical family can eat at a sitting. While freezing is an option, it’s a waste not to use this fresh fish when it’s available. Most families I know will simple cook the whole fillet and use the leftovers for sandwiches, but there are other ways of preserving the delicately flavoured fish.

Smoking is an option that’s long been practiced here on the coast and to a lesser extent in the interior. Smoking can be done any number of ways, but it usually combines brining and curing the fish before placing in a home smoker of some sort. The process can be labour intensive and take a long time to complete. You also need to have a source to properly add the smoked flavour–not always an option for many folks.

Another way to use the excess fish (and sometimes the whole fillet) that requires far less time and effort than smoking is Gravlax. Gravlax is a very common method of preparing salmon that has been practiced across Northern Europe and Scandinavia in various forms since the middle ages. Essentially it is a simple salt cure used to both extract moisture from the fish and enhance it’s flavour. Modern preparations such as the one below add sugar and herbs to balance the saltiness and impart subtle flavours to the dish. If you’ve got super fresh salmon on hand this is an excellent treat.

Sockeye Gravlax with Green Onion

  • Raw Sockeye Fillet*
  • White sugar
  • Pickling or Kosher Salt (coarse, non-iodized)
  • Thinly sliced green onion (white and green parts), Dillweed, or other herbs.

Method

  1. Debone, rinse, and pat dry a salmon fillet cut to desired size
  2. Place the fish skin side down on a clean piece of linen or a tea towel
  3. Lightly sprinkle all the exposed flesh with simple white table sugar
  4. Sprinkle a thin layer of salt over all the flesh, using less on thin sections of the fish and heavier amounts on the thicker areas
  5. Sprinkle a thin layer of sliced green onions over the entire piece of fish
  6. Wrap the linen or tea towel tightly around the fish and refrigerate, flesh side down on a suitable sized plate for 24 hours or more.
  7. Repeat steps 1-6 and refrigerate for a further 24 hours. You may need to change the linen or towel if there is an excessive amount of moisture drawn out of the fish.
  8. Remove linen or towel, rinse, pat dry with paper towel, slice thinly and serve alone, or on unsalted crackers or dense bread.

Notes:

Most sockeye caught on this coast has no nasty parasites and the salt will generally take care of any that might be there, but if you want to be on the safe side freezing the fish used for 24 hours prior to preparing will help eliminate any that might be hiding (as an FYI most Sashimi is served after freezing). I personally don’t freeze the fish as this tends to change the finished texture.

Thinner pieces of fish, i.e. the rear third of a standard salmon fillet, tend to cure in 48 hours or less. In our house this is usually the piece left over from a meal so it works out nicely. Thicker pieces may take an additional day to cure. The cure is “done” when the flesh reaches a firmness similar to pressing on the heel of your thumb. In order to get nice thin slices, it’s best to put the cured fillet in the freezer for 30 minutes before slicing and use a sharp thin bladed knife.

Some recipes recommend covering the fillet with a weighted plate while curing, but I don’t find it necessary, particularly with thinner pieces of fish.

Cheers,

Aaron

DIY Beerwalk: Tasty Treats on Vancouver’s East Side

Aside


Image

Not too long ago a good friend, Mal Harkness, asked me to arrange a beerwalk, or a walking tour of craft breweries, in the Grandview-Woodlands area (East End) of Vancouver. He knew that I frequent these places regularly for growlers (1.89 l refillable bottles) of unique and tasty fresh beer. He also knew that my shaded past involved quite a bit of home brewing so he figured I was the natural choice to lead the expedition. So with a little prompting I created a manageable walking tour of three of the city’s finest craft beer breweries along with one of the city’s new craft distilleries. We dragged along two members of Mal’s soccer team, Billy Rawsen and George Thompson, along with one of our fencing students, Nadine Wagner-Westerbarkey.

The plan was fairly simple: starting from a meeting point at Commercial Drive and Hastings Street in Vancouver we would first visit the three breweries before a stop at the distillery and a late lunch at a local restaurant. Below is the map of the route we took:

Image

  • We started at Storm Brewing. This is one of the oldest “Craft Beer” breweries in Vancouver and rightly famous for their dark beers and classic styles of European Ales. There’s usually between 6 and 10 beers on tap, four regular beers (including the sweet, thick and delicious Black Plague Stout) along with a rotating selection of so called “Brainstorm” concoctions. We were fortunate to find their classic extremely tart but delicious Imperial Flanders Red Ale on tap, along with some interesting brews such as Creamsicle and Rosemary. Cost is by donation, but you should expect to drop about $5 into the tip jar per person. I’ll be honest, this is my favourite breweries in the world and I’ve been a long time fan of brewmaster James Walton.  (310 Commercial Drive)

Image ImageImage

  • Next up was Parallel 49th Brewing and the most commercial of the three breweries. Most of the beers on tap are available at government liquor stores and select cold beer and wine outlets, but they usually have one or two that are not. Although not available on our visit, one of my favourites is their Salty Scot. Recently they have been experimenting with nitrogenated beers with some good results. The tasting room is very spacious and can easily handle larger groups. They sell samples by the 4oz glass for 1.15 plus tax, or you can buy a flight of four samples for $3.50. (1946 Triumph Street)

ImageImageImage

  • Next in line was Powell Street Craft Brewery. This is the smallest of the three breweries for the day. It is also the smallest in terms of space and it will be a tight squeeze depending on how many are in your group. This is the only brewery in the walk that only sells its beer on site. They are best known for producing really heavily hopped Northwest style ales. The sell only glasses of beer at $3.50/each so if everyone wants to sample, you might want to buy a few and share. Unfortunately I discovered that they are in the process of moving and will only be at this location until July 5th, 2014. (1830 Powell Street)

ImagePowell2Powell3

  • The last drinking spot was a bit of an add on. Odd Society Spirits is a relatively young, small batch distillery. They haven’t yet developed a wide range of different alcohol varieties, but at some point in the near future they will be producing a gin and offering a Canadian whiskey. When we dropped in, they had East Van Vodka and a great Crème De Cassis available. They will allow very small samples, but also make great cocktails – Approximately $8-10. (1725 Powell Street)

Odd1odd3odd2odd4

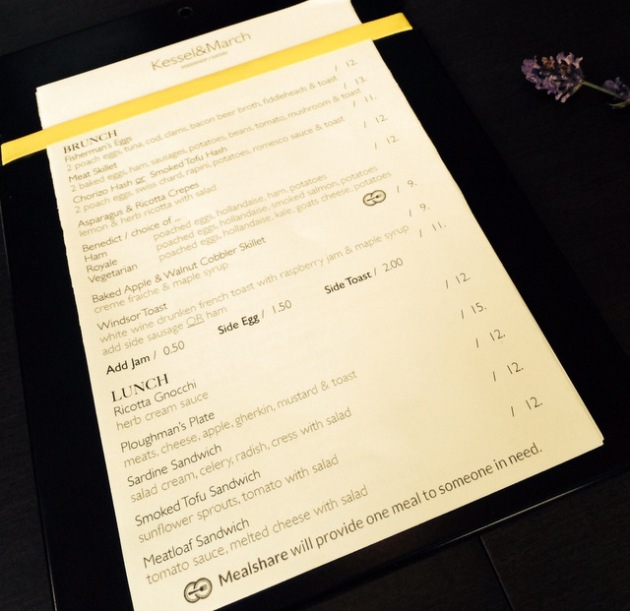
  • Kessel&March is a pleasant bistro a few doors down from the distillery where we grabbed a bite post walk. They have some local suds from Howe Sound Brewing on tap and run a brunch menu until 3pm Saturdays. (1701 Powell Street)

Image

The beerwalk turned out to be a lot of fun for all of us and very manageable in about a three hour window. Here’s a few additional shots from the area and a couple of outtakes from the trip (shots courtesy of Nadine).

Cheers,

Aaron

Art

art2

Art3

Silver Spoon

East Meets West Coast: Baked Thai Lingcod Curry

20140504-123832.jpg

It’s been a while since I posted anything new and interesting. Life kind of got in the way, but I came up with this dish a while ago and figured that it needed to be shared.

Some time ago I was given several large fillets of lingcod, a large white fleshed fish of the Greenling family common off the coast of British Columbia. I’ve been preparing these mild fillets in a number of ways, but I came up with this tasty and fairly easy to prepare recipe when I needed a dish to take to a dinner party.

The recipe below involves a homemade curry paste and stock, but to speed things up a store bought paste and stock could easily be substituted.

Menu

  • Baked Thai Lingcod Curry
  • Coconut Rice
  • Sesame Garlic Brocolli
  • Cut Fresh Fruit

Recipe: Baked Thai Lingcod Curry

Curry Paste:

  • 2 Tbs Canola or Peanut oil
  • 1 Sm Spanish or red onion chopped
  • 6 Sm Cloves of garlic chopped
  • 1″ Ginger root minced
  • 2-3 Tbs Sambal Oeleck to taste
  • 1/2 Tbs Shrimp paste or Anchovy paste
  • 2 tsp Dried red chillies ground
  • 2 tsp Cumin ground
  • 3 tsp Coriander seed ground
  • 1/2 tsp Turmeric ground
  • 1 tsp Dried lemongrass ground
  • 1 Tbs Spanish paprika
  • 2 Tbs Fish sauce
  • 1-2 Tbs Water
  • 10-15 Cashews
  • 3 Lime leaves centre stalk removed chopped

Curry/Fish

  • 2 Tbs Canola or peanut oil
  • 1 Med Spanish or red onion halved and sliced finely
  • 4 Sm Cloves of garlic sliced
  • 1-2 Tbs Sambal Oeleck
  • 3-4 Tbs Curry paste to taste
  • 1-2 tsp Fish sauce
  • 1-3 tsp Brown sugar to taste
  • 1 c Thai style fish stock, plain fish stock or low sodium Chinese style chicken stock
  • 1 c Coconut milk
  • 4 Lime leaves
  • Water for thinning while cooking
  • 1 Tbs Fresh Lime juice
  • 2-3 Tbs Fresh cilantro finely chopped
  • 1-2 Tbs Thai basil coarsely chopped
  • 2-3 lbs Lingcod or other firm whitefish fillets cut into chunks

Method

    Part 1: Curry paste

  1. Heat oil in wok or heavy bottomed pot over medium-high heat.
  2. Add onion and sauté until soft and starting to lightly brown.
  3. Add garlic, ginger, shrimp paste and sambal and cook stirring for one to two minutes until the garlic is fragrant.
  4. Add the dried spices and cook stirring for another minute.
  5. Add fish sauce, water, cashews and chopped lime leaves and continue to cook until well combined (about a minute more).
  6. Remove from heat and transfer to a food processor or blender and process to a paste adding a little oil if necessary to create a thick paste.
  7. ——–
    Part 2: Curry and fish

  8. In the same wok or pan used to make the paste add oil and heat over a medium-high heat.
  9. Add onions and sauté until translucent.
  10. Add garlic and sambal and sauté for two minutes stirring frequently.
  11. Add curry paste reserving a little to smear on fish pieces (about two teaspoons) and cook for another minute or two.
  12. Stir in stock, coconut milk and lime leaves and bring to a low boil.
  13. Reduce heat to low and add fish sauce and brown sugar to taste.
  14. Simmer for 20 minutes to allow for the flavours to combine adding additional water if necessary to keep the consistency medium.
  15. Remove from heat, stir in cilantro and lime juice and let cool.
  16. Cut lingcod into small serving chunks (about 1″x3″) and arrange in a lightly oiled casserole dish.
  17. Smear a little of the reserved paste over the fish and evenly sprinkle the Thai basil over the pieces.
  18. Pour the cooled curry over the fish and bake in a preheated 375 f oven for 20 minutes.
  19. Serve hot or warm.

Notes: I found the finished dish a little on the mild side and if you do you can always add a small handful (4-6) whole fresh red Thai chillies to the simmering curry to kick it up a notch (I usually just slit them with a single cut lengthways down the centre). The chillies also add a nice visual touch to the dish as well–just be sure to warn your guests.

Serves 4-6

20140505-125759.jpg

The Relic

20130629-154130.jpg

So I paid a visit to my brother up in the Sunshine Coast region of BC, for the Canada Day long weekend. The food and drink has always been great at his place and this time was no exception.

Recently he has become enamored with some of the more classic aperitifs such as Lillet and Campari. The other day he picked up a bottle of the Italian aperitif Aperol.

He said he found it a little on the sweet side and was at a bit of a loss as to what to do with it. I pointed out that I’d seen a few cocktails with Aperol, and that we should look them up.

Unfortunately, most we came across tended to involve very obscure mixes such as white crème de cacao or cucumber infusions. I decided instead to riff on the sours that I like so much and came up with the following recipe.

Recipe: The Relic

  • 1.5 oz Dry Gin
  • .75 oz Aperol
  • .75 oz Lime juice
  • 3-4 Ice cubes
  • Ginger ale to top up
  • Thin slice of lime for garnish

Method

  1. Combine first four ingredients in a tall Collins glass
  2. Stir well to chill
  3. Top up with ginger ale (about 2-3 oz)
  4. Garnish with a thin slice of lime

The name for this drink comes from a surly character featured in the 1970s drama, The Beachcombers, portrayed by the actor Robert Clothier. The show was set in the area where my brother lives–Gibsons, BC–so the name seemed fitting.

Cheers,

Aaron

How to Chop an Onion – An Idiot’s Guide

image

I know it sounds a little silly. We all know how to cut an onion right? Peel and chop. Pretty simple. But what if you need to have reasonably consistent pieces? Or you need to work quickly without losing a digit in the process?

I used to watch the old Mexican street vendors preparing salsas. Those women could make short work of an onion and produce perfectly minced pieces without even using a cutting board. I’ve tried to copy their method (which involved cross scoring the onion) in my kitchen, but I was never able to duplicate it with any degree of skill, so I came up with my own way. While it doesn’t have the elegance of those skillful street vendors, it does a passable job in fairly short order.

Method:

  • Cut the top and bottom of the onion and peel.

image

  • Half the onion. If there is a core (sometimes found on larger onions) cut a little V-notch in each half to remove.

image

  • Turn the onion on the side and make fan shaped cuts to the onion’s centre at the desired width of the finished piece size.

image

  • Cross cut the half against the grain, again at the desired width for the finished results. Use your fingers to keep the onion together as much as possible (not shown in the photo)

image

  • Continue the cross cuts until complete.

image

  • Break the pieces apart with your fingers to produce the finished product.

image

The example pictured above is chopped coarsely, but much finer pieces are easily achievable using this method. It takes a little practice to perfect, but it’s worth the effort.

Aaron